Revolt (default) layout explained
- nietaki
- December 4, 2025
Table of Contents
Methodology
I feel like the layout I ended up personally using on my Revolt can be a good example why I went with a 68-key layout in the first place, while smaller split keyboards are much more popular these days.
But instead of throwing out random things I think are awesome about it, I’d like to go through the thought process that led me to the layout. Figuring out which aspects I care about and prioritising them made the process much easier and more robust.
Let’s go through those aspects then:
Muscle memory-compatibility
I struggle to find a good term for this one - this could also be called “reducing cognitive load” or “minimising re-training”.
I learned to touch-type about 20 years ago (that made me feel old 😬) and used the same general layout all my life.
Now I know that Dvorak or Colemak could probably be more efficient than the antiquated QWERTY, but these days I’d much rather benefit from my muscle-memory than fight it.
Being able to “will” words to appear on the screen without getting distracted by the tools I’m using is great, even if it’s “just” at 85 WPM, not the ~120 WPM Colemak users are reporting.
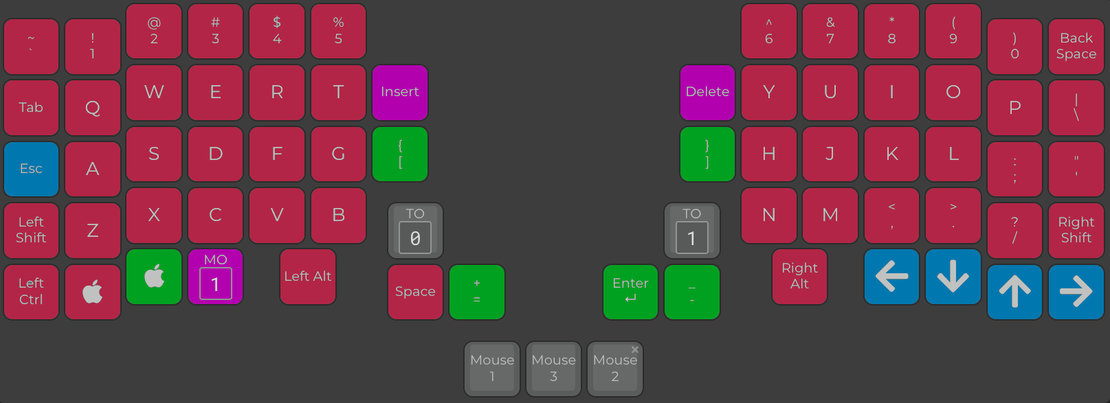
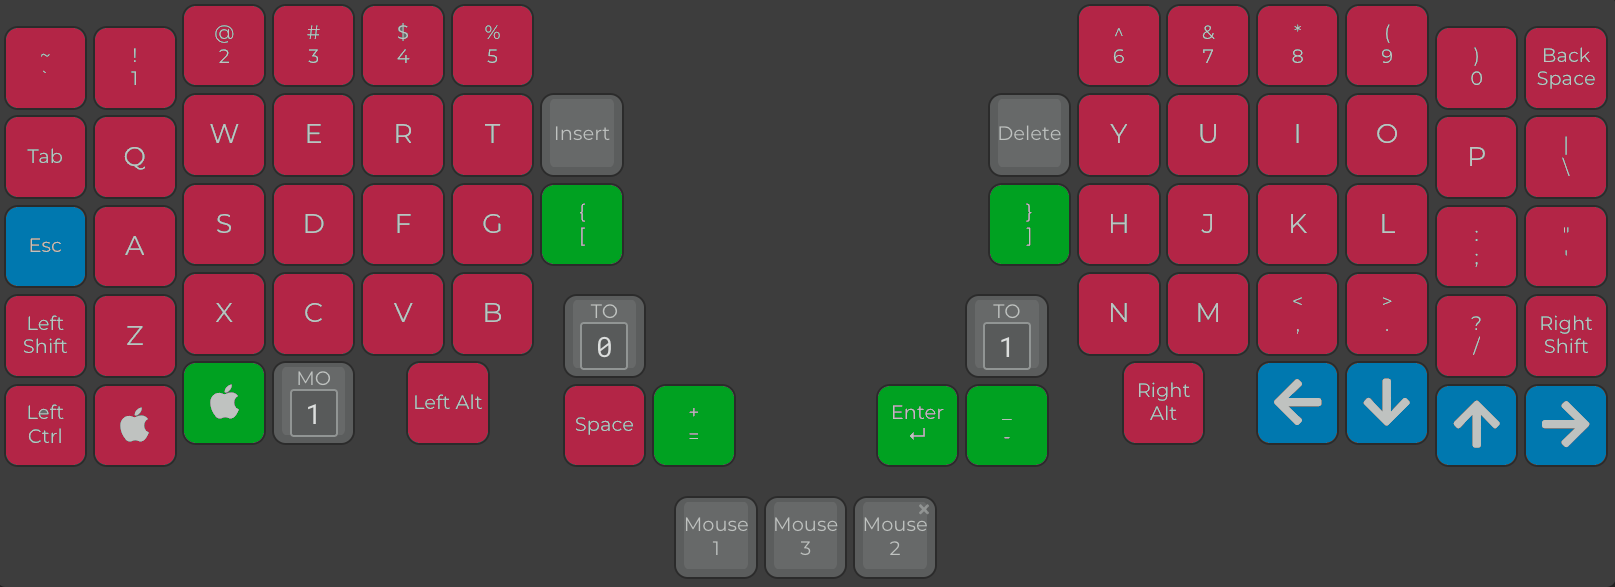
So the first priority is to have as many keys in the same places you would find on a keyboard you’d find in any MediaMarkt and lean more on their physical layout (ortholinear, column stagger) for ergonomics.
So let’s see which keys are in their “standard” locations (pardon my GIMP skills):
Ok, that took care of the majority of the layout already! What’s next?
Ergonomics
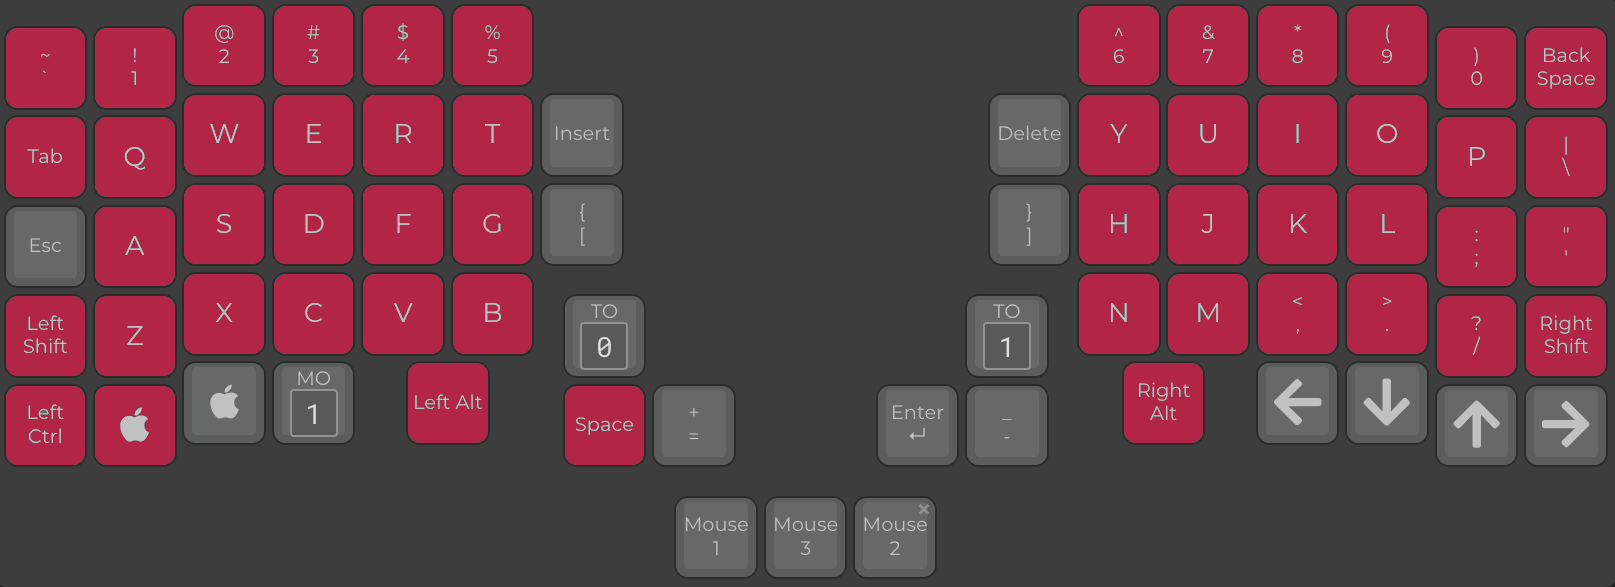
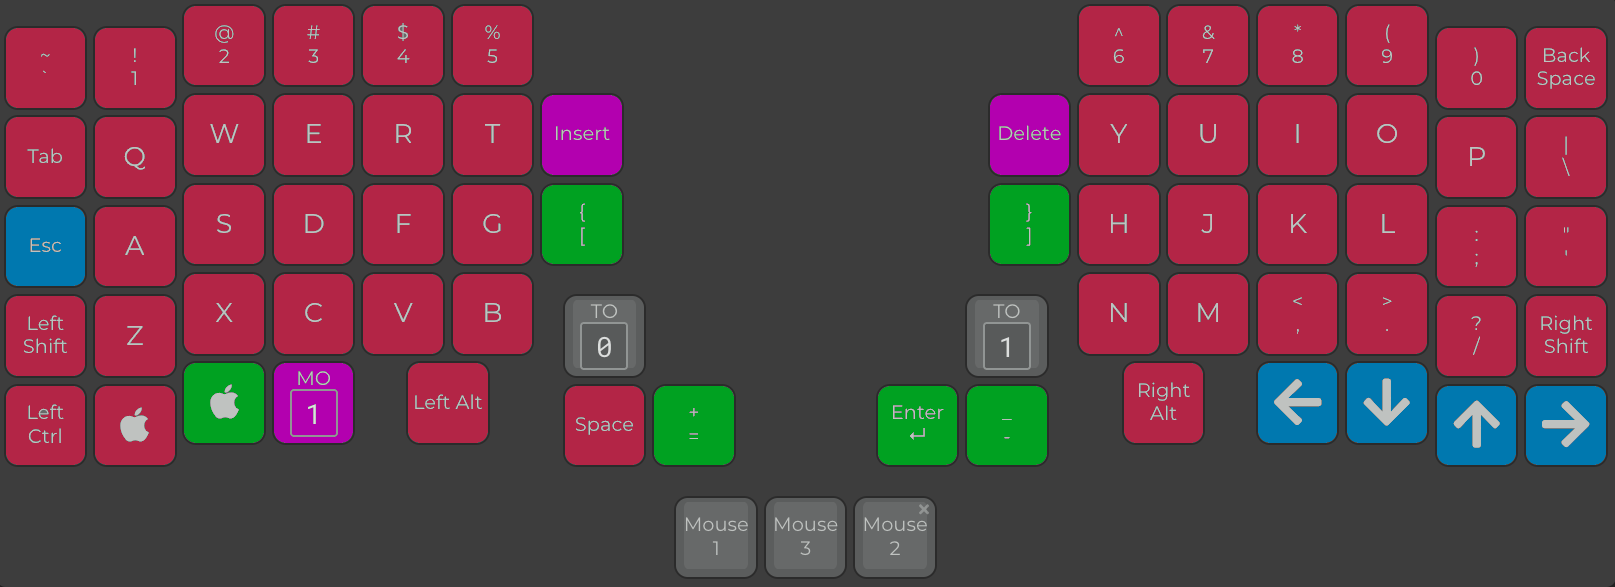
I think there’s two aspects here - making the frequent actions easy to perform and making annoying fat-finger mistakes less likely.
I definitely want the Enter key to be easy to reach, but not where my thumb
naturally rests - just so I don’t send unfinished Slack messages or something like that.
As a programmer I frequently type -/_ and =/+, so these keys should also be close by.
Square brackets ([]) are similar, but they don’t need to be as easily reached - just as long as
I don’t need to type them both with the same pinky 😉. It would be good if they were laid out symmetrically on
the keyboard though - that would make a lot of sense, at least to me.
What I don’t need on my default layer altogether is the CAPS_LOCK - I’d be pressing it more by accident than on purpose.
So now we add the green keys:
You’ll notice that I also added a second CMD/WIN key for some more finger-breaking Mac shortcuts.
Vim-friendliness
By now I’ve dealt with my top priorities, we’re getting to the icing of the cake.
I learned vim at the uni and couldn’t quit using it ever since (get it? Because quitting vim is hard!). I had periods where I used Visual Studio / IntelliJ / Emacs on a daily basis, but that was always with vim bindings (or evil mode in case of Emacs).
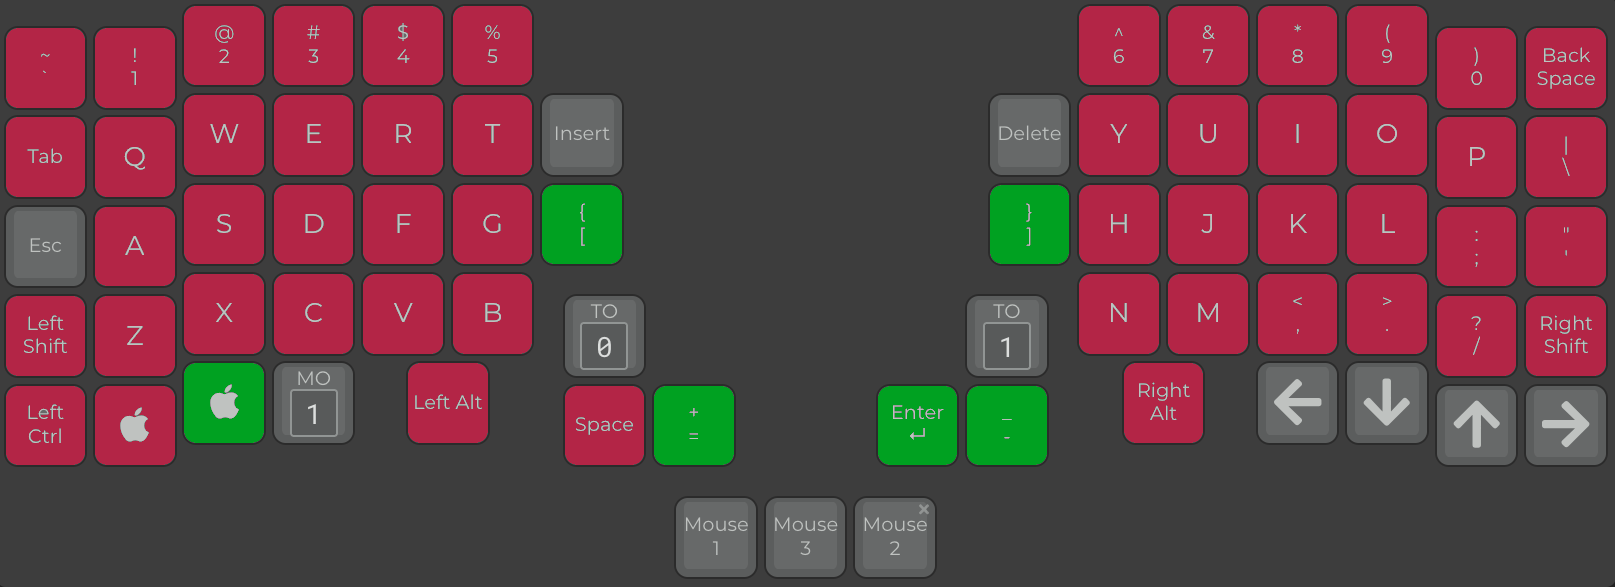
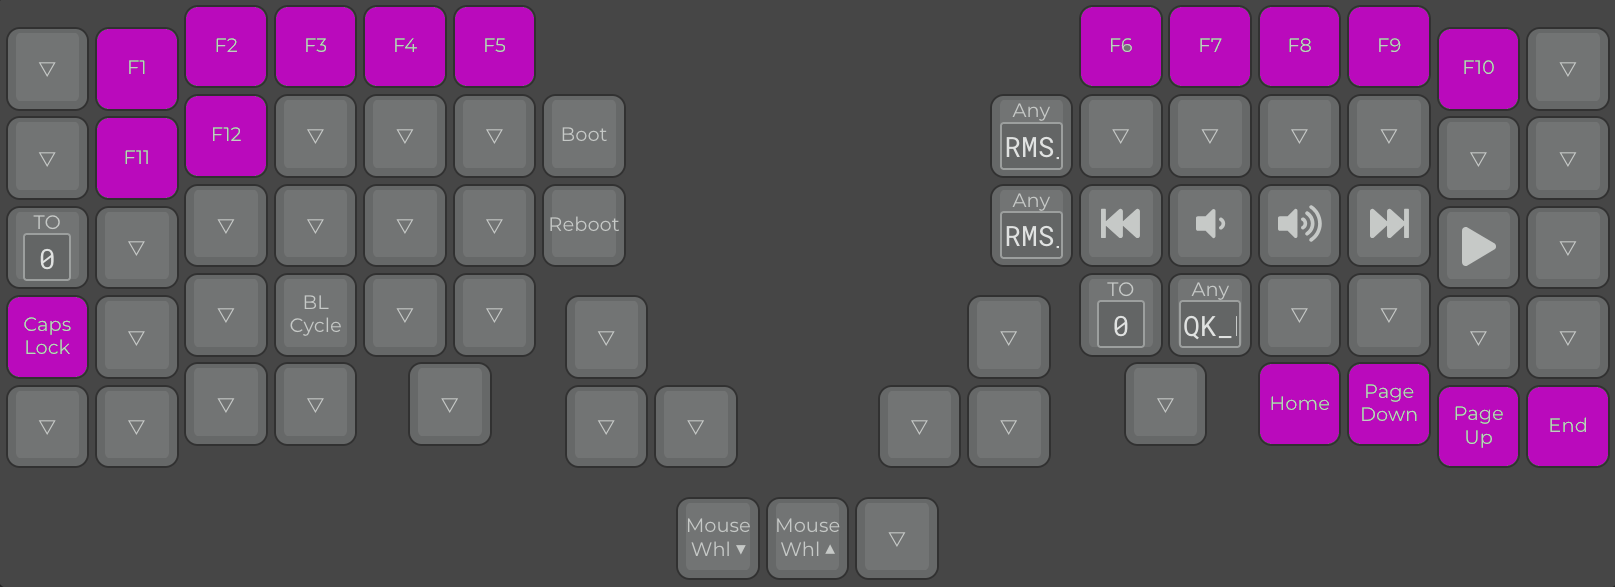
I can make my vim life easier for me by putting ESC where CAPS_LOCK would usually be, so I don’t
have to re-map it on the OS level.
I can also benefit from some of my vim muscle-memory to have the arrow keys mimic the HJKL movements
and have them fit neatly in the lower-right corner of the keyboard.
Feature-parity
Now we look at a full-sized keyboard and see if there’s anything else we need to live life without limits.
I don’t think I ever needed SCROLL LOCK and the like, but INSERT and DEL are pretty useful, let’s find a place for them.
The rest of the “feature parity” items are more than fine to go into the second layer - we added a key to access it (MO(1))
I also don’t want to go looking for a different keyboard when I need to boot into BIOS, so let’s make sure we have access
to all the function keys 😉. The CAPS_LOCK might be useful in intellectual debates with strangers on the internet, so let’s include it after all.
The Home, PgDn, PgUp and End are sometimes convenient to use, so we can add them to the second layer as well.
An intuitive place can be “behind” their corresponding arrow keys:
Extensibility
There’s always more things you can add to your layout - QMK functions, media control, MIDI functionality, game-specific layouts, …
Had we used all of our keys by now, it could be hard to integrate them into the layout. Thankfully we still have two keys in the thumb clusters we can use for layer switching. And they’re just out-of-the-way enough to make sure we don’t press them by accident.
That of course doesn’t mean we’re limited to “only” 4 layers - there are ergonomic ways to get to an arbitrary amount of layers with less than that - but that’s a topic for another time…
Summary
With this “framework” it took me just a couple of days to arrive at a layout I didn’t really change in the years since. I hope it means there is something to it - I know many people who are just as into ergonomic split keyboards as I am who keep tweaking their layouts on months on end never really getting to a config they stick with.
One benefit of having a 68-key keyboard is that it’s big enough that most days I don’t even leave the default layer, but at the same time compact enough that you can reach all keys without even moving your wrists.
That’s not to say I think this particular layout is the best for every single person - your goals might be different (or maybe their “priority order” is just different), so if you do a similar exercise you might end up with something entirely different. If you do, please drop by our discord and share your thought process - I’m curious to see how other people go about this sort of thing.
And if you want a good tool to help you with the thought experiment you can use our QMK configurator deploy - it’s a great tool for the job.